


Now that the headboard is all laid out in the design that I want, it's a good idea to take a little break. Go out and eat some chips and salsa and have a Margarita. This is important in the process. Because if you take the next step right away, the pattern will be permanent and you have no more chances to tweak. You go, take a break, let your china-cutting calluses rest, and get some perspective.
 In my case, I decided to change the rim at the curve across the corners. I ultimately switched it for some pieces that had more brown in them, which I thought was less jarring contrast than the plain white ones I had there originally.
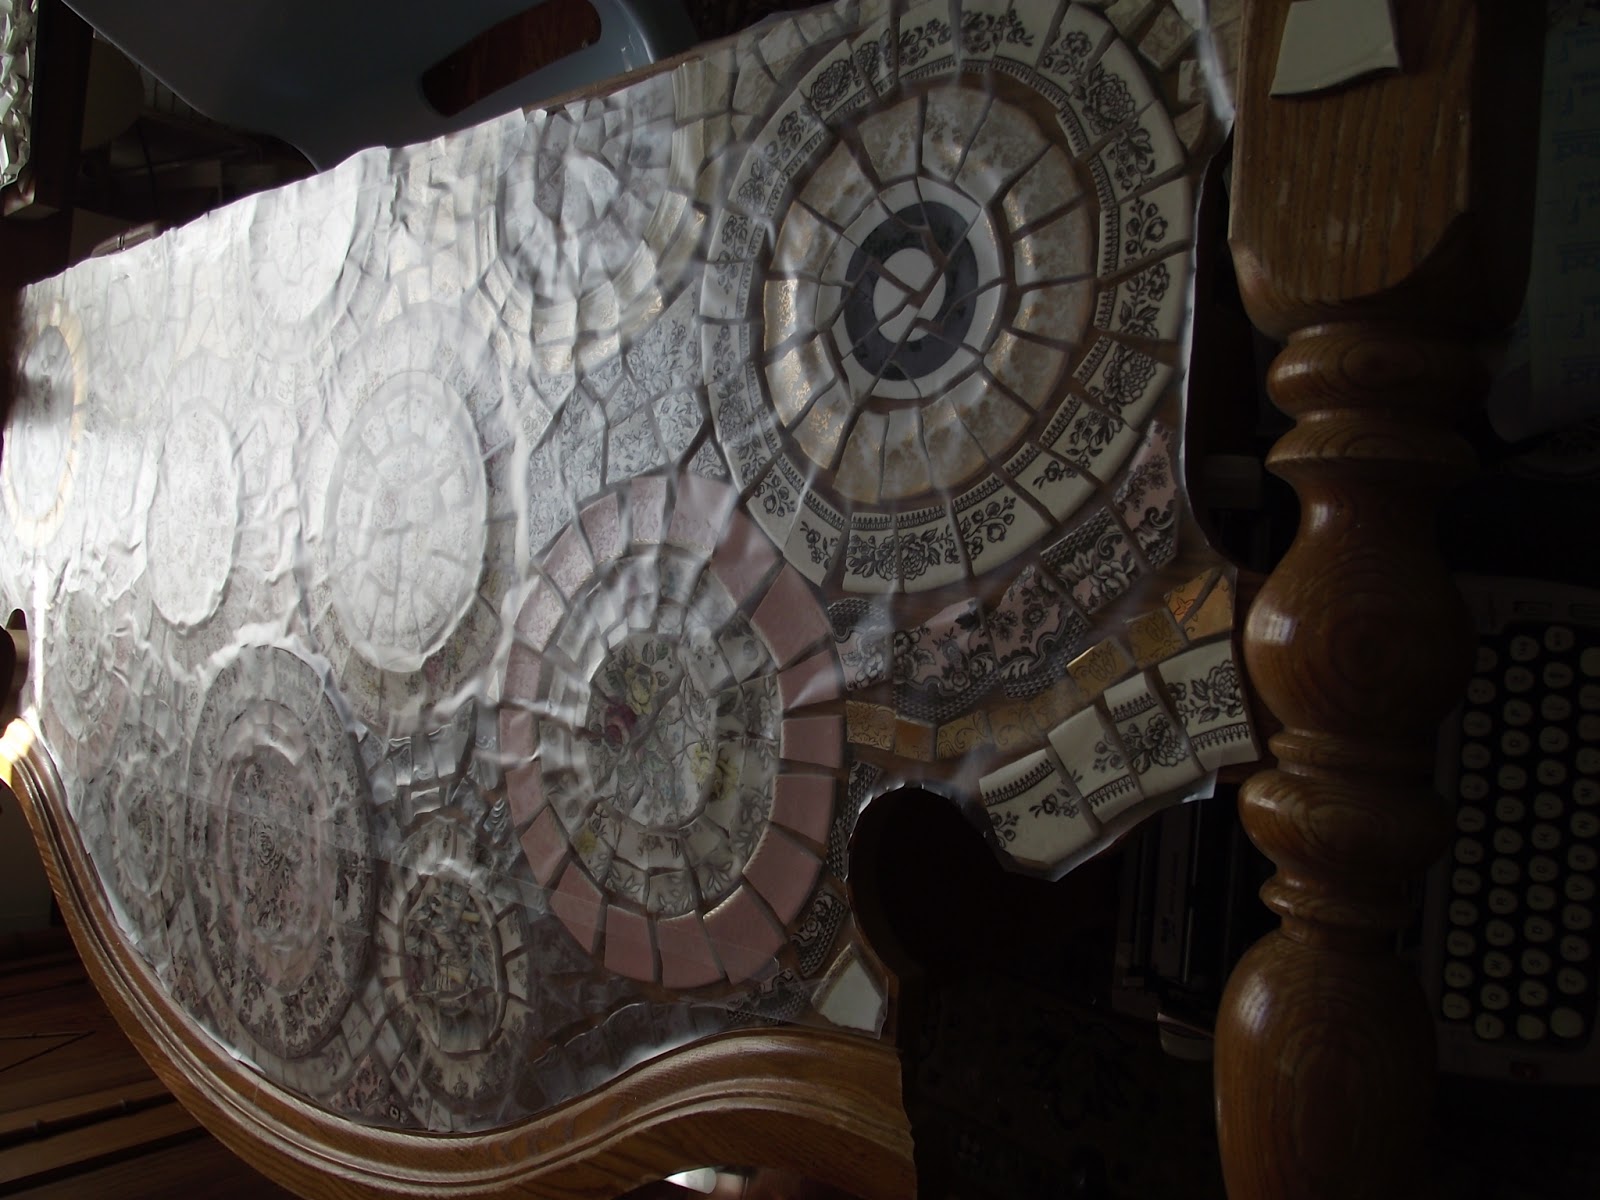 Then comes the tricky work. I use clear contact paper to spread over the entire design. Slowly pull away the paper while laying the contact down, moving left to right. Don't try to pull off all the backing paper at once, or you will end up dropping the sticky part down where you don't want it and pulling the design apart. Just slowly lay it down, but don't apply any pressure yet. Once you have the entire piece covered, then you smooth it over with your hands, rubbing the sticky into the curves and low spots, pulling all the china to the top. Next, use a hair dryer and a paintbrush to really get the sticky stuff working, melting the plastic a bit to really hold the tesserae (broken china) to the contact paper. I suspect there is a cheaper product to do this job, but this really works for me. It was my mom's idea and she is pretty brilliant. I can't imagine making mosaics any other way.
 On a small work, it would be fine to try to pull up the whole thing in one sheet, but realistically, anything bigger than one dinner plate is going to have pieces fall off when you pull it up. Which is actually good. If it was any stickier, you wouldn't be able to get it off when you lay it back down in the glue.
I cut the contact apart, making puzzle piece strips. I flip them over, with the bottom showing, but looking back in hind-sight, I begin to wonder if it would be easier to keep them right side up and just slide them into place instead of flipping them. See, you are always learning...

At this point, I decide to paint the headboard before gluing it all. Mostly because I need some proof that I making any progress at all.
I know that some of the paint will get scratched during the last step, but I decide it's worth it for the instant gratification created by the spray paint.

Next comes the glue, which I will apply with the floor trowel. I'm using regular mastic on this piece since water is not a factor, but for a back-splash, birdbath or outdoor piece, I would need to use a product designed for showers and swimming pools, which happens to be pretty unforgiving time-wise, so it is trickier to work with. The regular mastic will take at least a day or two to dry and cure. I use a trowel and try to keep it as even as possible, but I need the glue to be a little thicker than the comb on the trowel, to absorb the thickness differences between ironstone and porcelain plates.
Once the glue is on, it's time for the tough part of hunching over the headboard, flipping the puzzle pieces into place. What makes this frustrating is that as you hover a section before dropping it into place, at least one piece of china will drop off the bottom, falling into the glue in the wrong place and you will have it fish it out, and decide how you want to proceed. This frustration would have been alleviated a little bit if I was just sliding the pieces into place right side up, but not completely. China always falls off the contact paper. It just does. Not a lot, but some. You deal with it the best you can and move on. Don't push the pieces into the glue at this point either. Just set it on top of the glue and move on to the next piece until all the sections are in place.
 After everything is on the glue, then I use a large sheet of matte board and lay it down on top of the design and rub it all into the glue. Your hands are curved and will push some parts down further than others, so something large and flat is best. I have tried using a rolling pin as well, but it puts too much pressure on it the china and can push a thin piece of porcelain down too far, causing glue to squeeze up between the plates and stick to the contact paper, which leaves no room for the grout and ruins the finish. Just a light, flat push is all you want to do.
 Now, you want to wait a bit before pulling off the contact paper so that glue sets a bit. Right now, it is about the consistency of peanut butter, not enough to pull it away from the contact paper. But you also need the air to hit the glue in order for it to dry, so I started pulling contact paper pretty quickly. This will be a long, frustrating process, to be honest, because you just got it all nice and smooth and the contact paper will pull it up in places. Just work slowly, and don't expect it to be easy. Use the hair dryer again to soften the contact paper if necessary. Several hours later, I was done pulling up the contact paper and was starting to see a glimpse of what the final product was going look like.

And now, time to see your Favorite chiropractor. (that's funny, see, because my chiropractor is Dr. Favorite!) Take care of that lower back because you have two more steps to finish!


3 comments:
I can't believe how patient you are! And I can't believe how gorgeous the bed is! It's much more stunning in person too!
unbelievable! simply breathtaking! Honestly I would totally screw it up because. . . I'm impatient! You are amazing Vanessa! WOW! speechless!
I have a question regarding the materials you use. Are all the tiles broken china plates? Or are the solid "filler" pieces something else? Where did you get them from?
Post a Comment