photo LFD-header_zpsrtqgwepm.png
 photo home_zpsbeyvjzpc.png  photo story_zpsryll93pv.png  photo church_zpsutjg0pcs.png  photo vintage_zpsrnxzz1s4.png  photo mosaics_zpslhx9tjaj.png  photo gallery_zpsrtj0zvcz.png
Showing posts with label howto. Show all posts

Monday, March 12, 2012

How to Make a Mosaic Headboard - The Lost Post

I had a reader contact me the other day asking what ever happened to the last two steps I mentioned when writing the mosaic headboard posts.  With all that was going on around the fall show, I must have forgotten to write about those steps. 

So to help the reader out, let me finish up now. 
Once the glue is good and dry, in this case, about a week later...it's time to grout.  I'd like to point out that letting the glue dry completely is very important, especially on a wood base like this headboard.  If you try to grout too soon, the wood will warp.   I don't know exactly why this happens, but I have made this mistake several times on wooden bases like table tops, a lazy susan and a wooden sign.  It's a strange reaction too, because it doesn't happen right away. It will be about a week later that you notice the grout cracking apart and the wood curving.  Eventually, it will dry out and curve back into place, but by that time, the grout will be compromised and you will need to re-do it, so by all means, just wait and let the glue cure for longer than the recommended time on the packaging.  As my dear mentor/professor in college used to say, "Perfection takes a little longer."

I have read a few theories about choosing a grout color, but I just go with my gut.  I tend to like darker colors over light ones, which for me tend to look too baby sweet.  I like the more serious even masculine look of darker grout because I think it brings a contrast to the very feminine look of floral china.  More important than the color is the choice between sanded or unsanded grout.  I have used both and let me tell you, sanded grout is just much easier to work with for me.  Unsanded grout is best for very small spaces between pieces. It cannot be used on a mosaic with a space of more than 1/8 of an inch.  I only really use it for non-functional 2 dimentional framed work and even then , I don't really love it. 

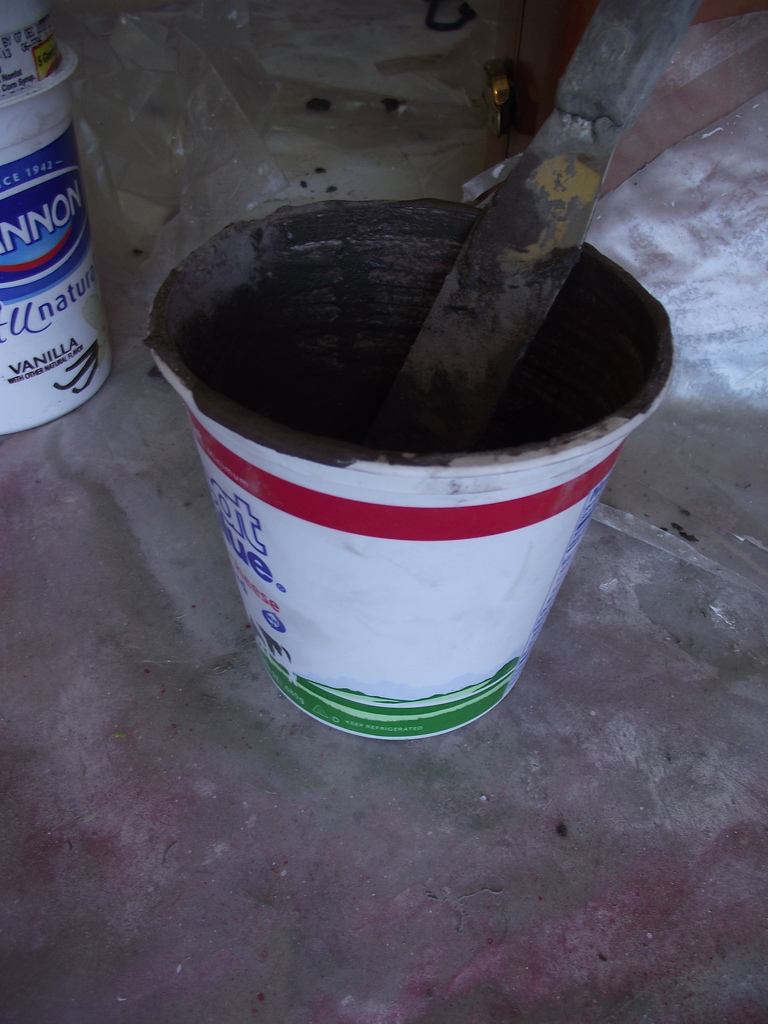
So on this project, I used sanded grout. I mixed several batches since it does begin to dry out after 15 or 20 minutes, so making batches gave me a longer working time.  I mix in large yogurt tubs since our recycling center doesn't take number 5 and 6 plastic. I fill the cup and then add water slowly, mixing it to the consistency somewhere between peanut butter and yogurt. 

Grouting is easily the messiest part of the whole deal, so work somewhere with the floor draped in plastic, and where you don't mind sweeping up a lot of sand and particles.  It's not as messy as dry-walling, but it's pretty close.

Slowly work the grout in, in a circular motion, squeezing it into every crack.  As it dries, the grout becomes more like the consistency of cake icing with the sand like undissolved sugar. The sand is abrasive, so be mindful of your china and try not to rub it hard over hand-painted porcelain and other delicate surfaces because it will remove the pattern if you are too zealous.  This is an exciting part of the project because you are getting your first glimpse of the finished product.  As you work the grout into the gaps, the grout will begin to dry with a bit of a frost over the surface of the china.  As this begins to happen, use a dry sponge or my favorite...old mismatched socks to begin to buff the grout off the china.  Do not use a wet sponge at this point because it will smear too much. 

It's a good idea to wear gloves, but I usually don't. Officially, that's really bad for you, etc.  Unofficially, I like to be able to feel the grout at this point. But it really dries your hands out and I often get cut at this point.  I started wrapping each knuckle with cloth bandaids before I grout so that I can feel what is happening AND protect the high points of the hands where I am mostly likely to get cut. 
Don't be cleaning up or dumping your grout tools in the sink or down any of your drains. You think it will rinse down, but it won't. It will settle in any low point and build up there until you have a plumbing disaster.  Keep a bucket of water on hand to soak your tools until you can take them to a outdoor spigot or hose. Grout is just prettier concrete so it should be treated accordingly.
Keep buffing and polishing until the grout is out of the low points on top of the china, but not so intensely that you pull it back out of the cracks.  In a couple of hours, the grout will be set and you won't be able to change much without a lot of miserable picking.  You will begin to see the china looking shiny again. When you get it looking the way you like it, walk away.  Get a drink. Rub your hands with Mary Kay's Night Emollient Lotion. You will smell like an old lady, but your hands will thank you. 

After the grout dries, you may want to seal the grout.  This is the final step.  It isn't strictly necessary on this kind of piece which isn't really going to see a lot of water, like a birdbath or mailbox, but I did go ahead and seal it with a grout sealer just to make it really tight. 

Grout sealer can be painted on with a soft brush or you can buy spray on. The benefit of the brush on is that you get more control. The benefit of the spray on is that you can use it right away, and not have to wait until the grout cures for 24 hours or more.  The most important part of grout sealing is to keep your head in the game and not let it dry on the china and make it cloudy.  If that happens, you can scrub it off with a paste of baking soda and water, but really, after you have worked this hard, you don't want to be scrubbing more at this point.  Use more socks or ripped up t-shirts to finish buffing, and then touch up any paint that was damaged during grouting. 

Now stand back and admire your work.  You did it. Bully for you. 

Tuesday, September 20, 2011

How To Mosaic - How Do You Get the Pieces Even?

Another question people always ask me is is "How do you get the pieces like that...all even?"  Or it's slightly annoying counterpoint, "You just smash all those dishes, huh? Just throw 'em on the ground...must be a great way to relieve stress."

On the contrary, I do NOT just smash dishes. Maybe I did that once with one stack of plates because I may or may not have been having a full on yelling fight with my husband, but it really didn't make for much of a controlled mosaic and it certainly didn't do much for the conversation. Except maybe, he knew I don't normally do that to my plates and realized how ticked I really was. (Oh yeah, news flash.  Deliriously happy couples also have good old fashioned air-clearing fights once in a while. But that's a whole other post.)

hammer smashed shards make ugly mosaics
If you google "how to mosaic" at all, you are going to get a really crappy tutorial about just putting any old dish stuff in a pillowcase and tapping them with a hammer.  Guess what?  That looks ugly and sad. And it shreds the pillowcase to pieces, which I don't think they make very clear, either.  I know that's not what you want to make. You want to make something pretty. So they will tell you to use proper eye protection and blah blah blah, but they don't tell you how to make a pretty mosaic.

If you want to make a controlled pattern and get the designs from the dishes that you really want to display, you will need the proper tools.  You need different tools for different kinds of dishes.  And you need to be able to tell the difference between the different kinds of dishes.  I'm here to help you.

porcelain is translucent
This isn't precise, but there are about three different kinds of dishes that you will encounter:  Porcelain, china and pottery.  That's not entirely precise, but it's a good basic breakdown. Porcelain is generally very thin and is translucent. You will know it is porcelain when you hold it up to the light and you can see light through it.  (Confusingly enough, some handmade pottery is also made of porcelain, but that's also a whole other post.)  For mosaic purposes, porcelain is generally thin, often made in Japan or England, and is great for mosaics.

there is one porcelain plate in the stack...can you spot it?
China is a generic name for ironstone, earthenware, dishes, restaurant ware, vitrified china, ceramic, etc. It is made in various ways over the years, with a lot of different kinds of density. I won't bore you with the details, but this is basically what you are going to find on the tables of most people. And some of it is great to mosaic with and some of it lousy.  It will take you lots of time and practice to figure out what you like to use and what you don't like to use, but if it has some flat surface to it, you can probably use it.

handmade pottery
Pottery is made of clay. Porcelain clay. Or other kinds of clay. But it is generally thicker and sturdier than china. Pottery is wonderful but hard to mosaic with because it's thick to cut and when it's handmade, isn't uniform in thickness. If I'm going to hammer-smash anything, pottery is probably it because you get really tired cutting thick pottery after a very short amount of time.


Now, there are two kinds of cutters. Tile nippers and rotary cutters.  Tile nippers have two flat nips that look like teeth. Rotary cutters have two wheels. You use a rotary cutter on porcelain and tile nippers on china and pottery.  You can also use a rotary cutter on most china, but not on pottery. It is probably going to be too thick for the wheels to get around.

You cannot use nippers on thin porcelain. It will make you cuss.
my collection of cutting tools
Tile nippers shatter porcelain into shivers and weird shapes.  Porcelain is just too thin for the nippers to pinch the porcelain into a clean break.

 So just to sum up: Nippers for china and pottery but not porcelain; Rotary cutter for porcelain and china but not pottery.

You can get tile nippers from the tile department of a hardware store. I got my rotary cutters from a craft store.  They cost between 12 and 15 dollars each. (Unless you get your nippers from the thrift store for a mere $1.75 SCORE!) 
To cut with nippers, you put the nippers teeth perpendicular to the edge of the dish.  I generally try to cut a plate in half, then quarters, then eighths.  It doesn't always work, but you get a better cut when you keep cutting your pieces in half than if you try to cut off just a bit at a time off a large piece.  I have cut thousands of dishes now, so I've had lots of practice, but it doesn't always go the way you want it to. The more you know the kind of dish you have, though, the better your chances of making a good cut from the get-go.

I have several pairs of nippers. They get worn down after a while. But the worn ones are good for thicker pottery. The newer ones are good on thinner china. Robb got me the set on the right for Mother's Day five years ago now and just see where they've taken me.

To cut with the rotary cutters (which you could also use on glass. I just don't like working with glass very much.)  you line up your wheels deep into the place where you want the cut to be.  Nippers start a crack that becomes the break.  Rotary cutters actually cut into the porcelain and pinch it apart.  You get a good, controlled cut with rotary cutters, but they take a lot of practice.  The screws that hold the wheels on get loose and you have to tighten them pretty often (the wheels are adjustable so you can make beveled cuts).

And there you have it. The right materials, the right tools, lots of practice is how you get those nice even pieces for your own mosaic projects.  Happy nipping.


Monday, September 12, 2011

How To Make a Mosaic Headboard - Part 2

It's been a super productive weekend!  I have finished the next steps on the mosaic headboard project, trying to answer the question, "How long does it take to make that?"

Now that the headboard is all laid out in the design that I want, it's a good idea to take a little break. Go out and eat some chips and salsa and have a Margarita.  This is important in the process.  Because if you take the next step right away, the pattern will be permanent and you have no more chances to tweak. You go, take a break, let your china-cutting calluses rest, and get some perspective.

In my case, I decided to change the rim at the curve across the corners.  I ultimately switched it for some pieces that had more brown in them, which I thought was less jarring contrast than the plain white ones I had there originally.

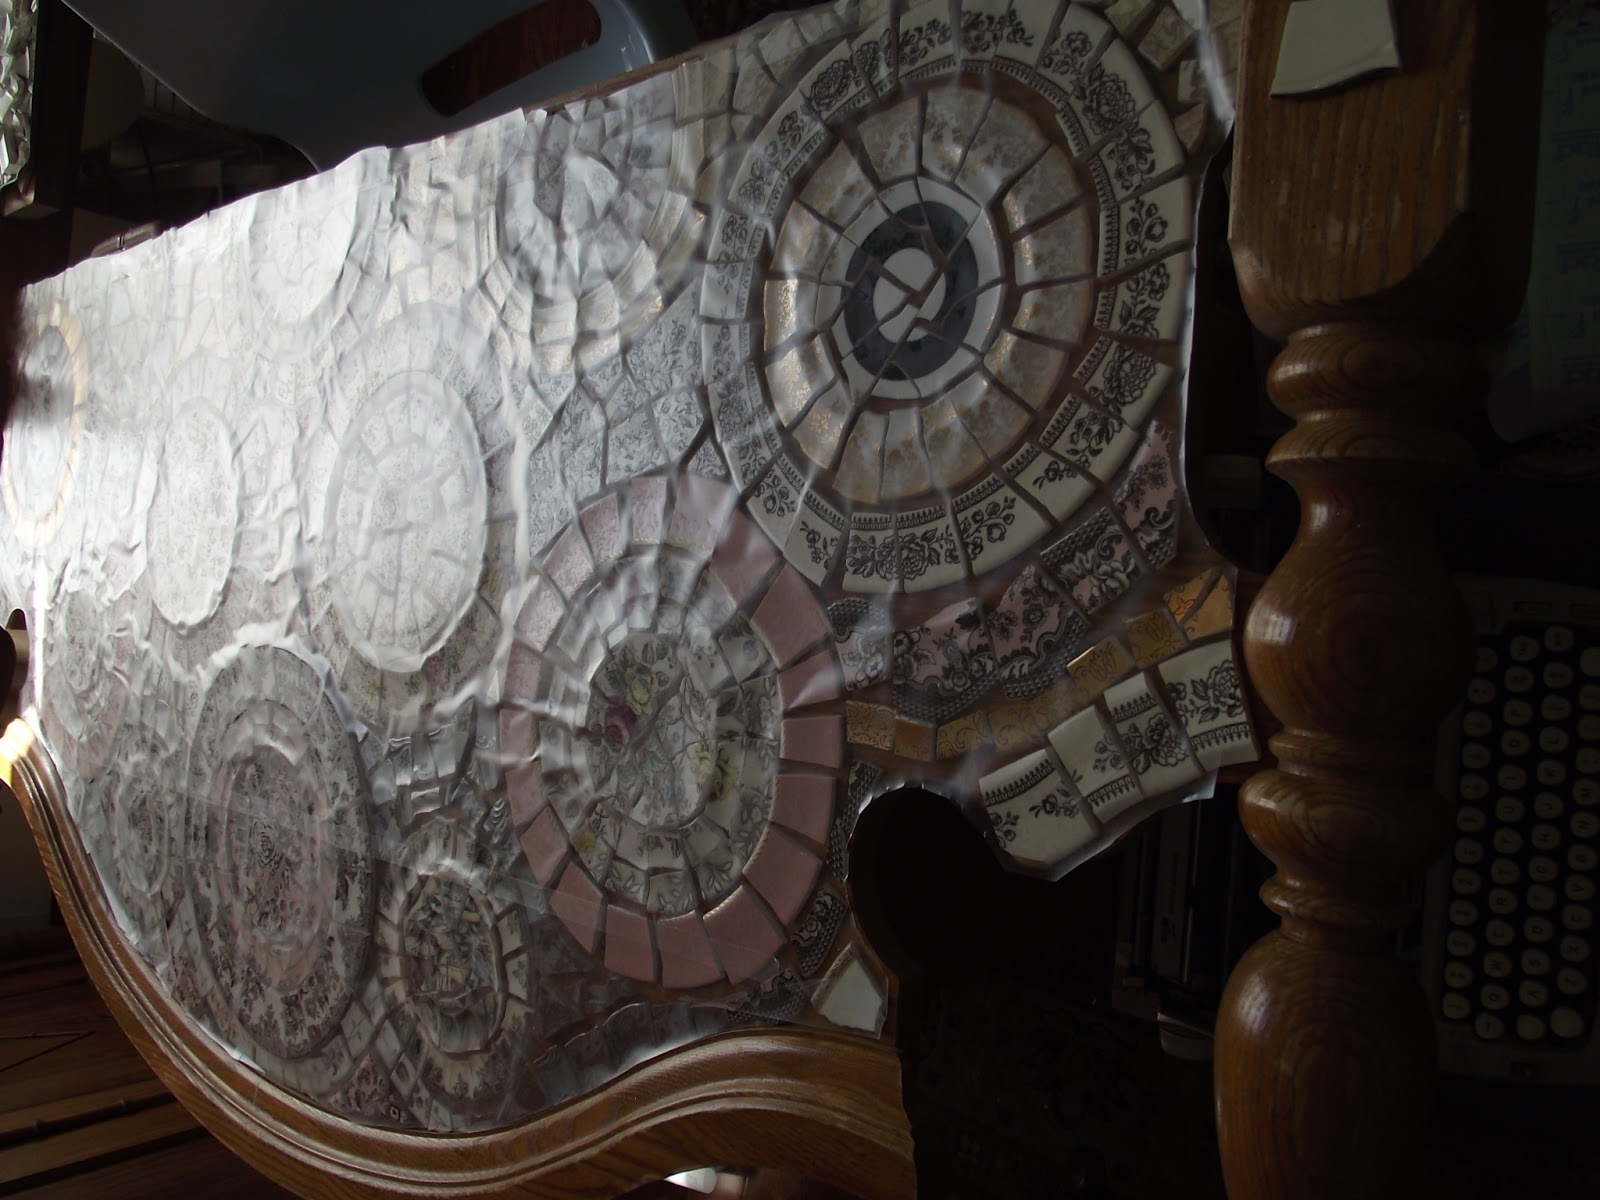
Then comes the tricky work.  I use clear contact paper to spread over the entire design.  Slowly pull away the paper while laying the contact down, moving left to right.  Don't try to pull off all the backing paper at once, or you will end up dropping the sticky part down where you don't want it and pulling the design apart.  Just slowly lay it down, but don't apply any pressure yet. Once you have the entire piece covered, then you smooth it over with your hands, rubbing the sticky into the curves and low spots, pulling all the china to the top. Next, use a hair dryer and a paintbrush to really get the sticky stuff working, melting the plastic a bit to really hold the tesserae (broken china) to the contact paper.  I suspect there is a cheaper product to do this job, but this really works for me. It was my mom's idea and she is pretty brilliant.  I can't imagine making mosaics any other way.

On a small work, it would be fine to try to pull up the whole thing in one sheet, but realistically, anything bigger than one dinner plate is going to have pieces fall off when you pull it up.  Which is actually good. If it was any stickier, you wouldn't be able to get it off when you lay it back down in the glue.

I cut the contact apart, making puzzle piece strips.  I flip them over, with the bottom showing, but looking back in hind-sight, I begin to wonder if it would be easier to keep them right side up and just slide them into place instead of flipping them.  See, you are always learning...

At this point, I decide to paint the headboard before gluing it all.  Mostly because I need some proof that I making any progress at all.
I know that some of the paint will get scratched during the last step, but I decide it's worth it for the instant gratification created by the spray paint.

Three cans of Krylon's Satin Ivory later, the head and footboard have a stunningly perfect French country finish and I'm ready to glue. I have moved the whole operation out the garage by now, with plastic sheeting underneath for the paint but also for the globs of glue that will hit the floor, no matter how neat I am. 

Next comes the glue, which I will apply with the floor trowel. I'm using regular mastic on this piece since water is not a factor, but for a back-splash, birdbath or outdoor piece, I would need to use a product designed for showers and swimming pools, which happens to be pretty unforgiving time-wise, so it is trickier to work with.  The regular mastic will take at least a day or two to dry and cure. I use a trowel and try to keep it as even as possible, but I need the glue to be a little thicker than the comb on the trowel, to absorb the thickness differences between ironstone and porcelain plates.

Once the glue is on, it's time for the tough part of hunching over the headboard, flipping the puzzle pieces into place.  What makes this frustrating is that as you hover a section before dropping it into place, at least one piece of china will drop off the bottom, falling into the glue in the wrong place and you will have it fish it out, and decide how you want to proceed.  This frustration would have been alleviated a little bit if I was just sliding the pieces into place right side up, but not completely.  China always falls off the contact paper. It just does. Not a lot, but some. You deal with it the best you can and move on.  Don't push the pieces into the glue at this point either.  Just set it on top of the glue and move on to the next piece until all the sections are in place.

After everything is on the glue, then I use a large sheet of matte board and lay it down on top of the design and rub it all into the glue.  Your hands are curved and will push some parts down further than others, so something large and flat is best. I have tried using a rolling pin as well, but it puts too much pressure on it the china and can push a thin piece of porcelain down too far, causing glue to squeeze up between the plates and stick to the contact paper, which leaves no room for the grout and ruins the finish. Just a light, flat push is all you want to do. 

Now, you want to wait a bit before pulling off the contact paper so that glue sets a bit. Right now, it is about the consistency of peanut butter, not enough to pull it away from the contact paper.  But you also need the air to hit the glue in order for it to dry, so I started pulling contact paper pretty quickly.  This will be a long, frustrating process, to be honest, because you just got it all nice and smooth and the contact paper will pull it up in places.  Just work slowly, and don't expect it to be easy.   Use the hair dryer again to soften the contact paper if necessary.  Several hours later, I was done pulling up the contact paper and was starting to see a glimpse of what the final product was going look like.

You are now just two more steps away from a finished mosaic headboard and footboard. The glue needs to dry for several days to make sure it is fully cured.  If you attempt to grout it too soon, you will get a cracked grout  and  worse, the wood on the headboard will try to absorb the moisture and will warp. So don't get impatient!  (And how do you think I know this?  I've been impatient before!)

And now, time to see your Favorite chiropractor.  (that's funny, see, because my chiropractor is Dr. Favorite!)   Take care of that lower back because you have two more steps to finish!


Blogging tips