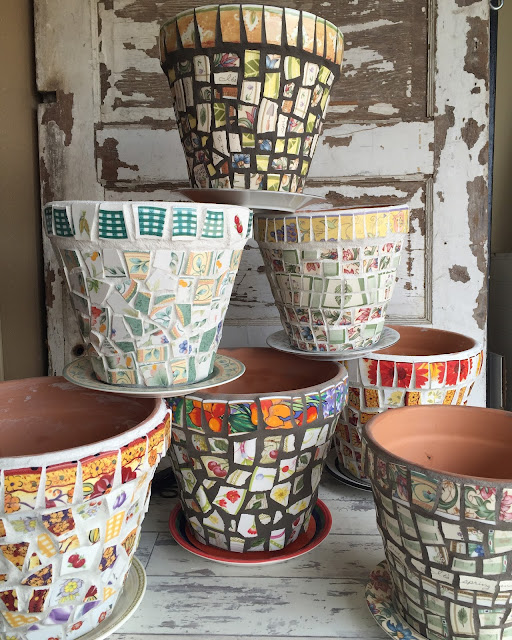
Few mosaic projects are more satisfying and practical than decorating a basic terra cotta flower pot. I've probably lost track of how many of these I have made over the years, but I'm sure it is in the hundreds. Here's how I made the most recent batch, which are actually all sold already. As I make more, feel free to ask for any colors or themes you would like me to make for you!
I begin with playing with patterns and colors, laying dishes out on the floor so that I can get enough distance to imagine how the colors will interact on the surface of the pot. This is a skill that improves with practice.
As with anything creative, it is nice when you feel inspired. Unfortunately, I was not feeling it with these pots. The weather was cold and my family was sick and I was weary at the thought of spending time in the studio on several of the nights I normally work. But the more practice you put into your craft, the more you can work from a place of experience and instinct without the warm comfort of the Muse cheering you on.
The next step is to begin cutting the pieces and arranging them. I use several different kinds of nippers to get the size and shapes I need. (I've written about my nippers before in this post.) I use tile adhesive in a cake-decorating bag to apply glue. It has a creamy peanut butter consistency and a perfect working time of about 30 minutes.
I confess, I was not as happy with the pots at this point as I thought I would be. But it is important to allow room for your ideas to unfold and be what they are. Grout has the ability to change the entire mood of a piece, so I waited for a nice day when I could open the garage door and really see the colors.
 |
| bahama beige grout |
 |
| white grout |
 |
| gray grout |
I ultimately chose to use three different colors of grout: Bahama Beige, White and Gray, all in the sanded version (I personally hate the consistency of unsanded grout and try to never use it) Once the grout has cured a bit, I add a spray sealer to the exterior and the interior as well.
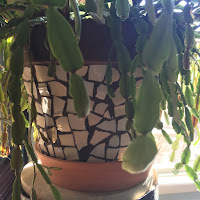
I have several pots that I made at least 5 years ago that I use for myself. The blue ones (which were on the windowsill inside and the dogs knocked over and cracked, so I kept them instead of selling them) have been outside on the covered front porch for years now. They have held geraniums, marigolds, pansies, vinca, and mums almost non stop, and though they are dirty, they have not eroded at all. I also have large pot inside that holds my aged Christmas cactus. It's been in this pot for about 5 years as well and though I forget to water it sometimes, it has seen plenty of moisture at other times (I put it outside in the summer) and has stood up to time, dirt and water very well. I don't ever suggest that my pots be left in the elements to freeze, of course.
So if you are wanting to try making a flower pot yourself or if you would like me to make one for you, this is how it is done! Enjoy!
 |
| these are medium and large flower pots which currently sell for 35-48 dollars each and come with a corresponding plate or saucer |


3 comments:
I want to come to your store and buy some. You are a wonderful artist.
These are absolutely stunning and you have such a creative mind. Its such an out of the box idea to think of decorating the pots like this. Great work!
Hi ,
I was hoping to do this project with kids. There are so many adhesive options out there it's overwhelming! I want to make sure it doesn't all fall apart when we plant and water. If you are willing to share...did you seal the pots first with watered down weldbond? What adhesive did you use?
Thanks for sharing!
Ashley
Post a Comment