


 This morning, I'm going to show how I made my decoupage bike. Which is in Eureka Springs right now. But I'm going to get it and bring it home to Fayetteville this week. Sometime. You know, in all my free time. That I always think I'm going to have in the summer. When in reality, I have three times as much to do and less time to do it in. Because I sleep in til 7:30. Because I CAN!
So the bike....
First I collected images from 1950s travel magazines of bikes. I trimmed them a bit, but waited to really trim them until I knew where I was going to place them on the actual bike.
 Then, for some contrast and interest, I pulled maps from a torn 1900s geography book. This was great to work with because the pages were quite thick, but they were also fragile because they were so old. The paper gets tissue thin when you add the glue, so you have to really think about how you are going to use the paper before you glob it up.
I always really struggle to know if I'm going to alter a vintage item. There are two chairs in my garage right now that I'm wrestling with this very second. There are two things I just never want to do...wreck a truly fine antique or use bad grammar on a tv interview (so far in the two tv interviews I have done, I managed to use correct grammar. Life goal accomplished.) All that to say, I do a lot of research before radically alter something old.
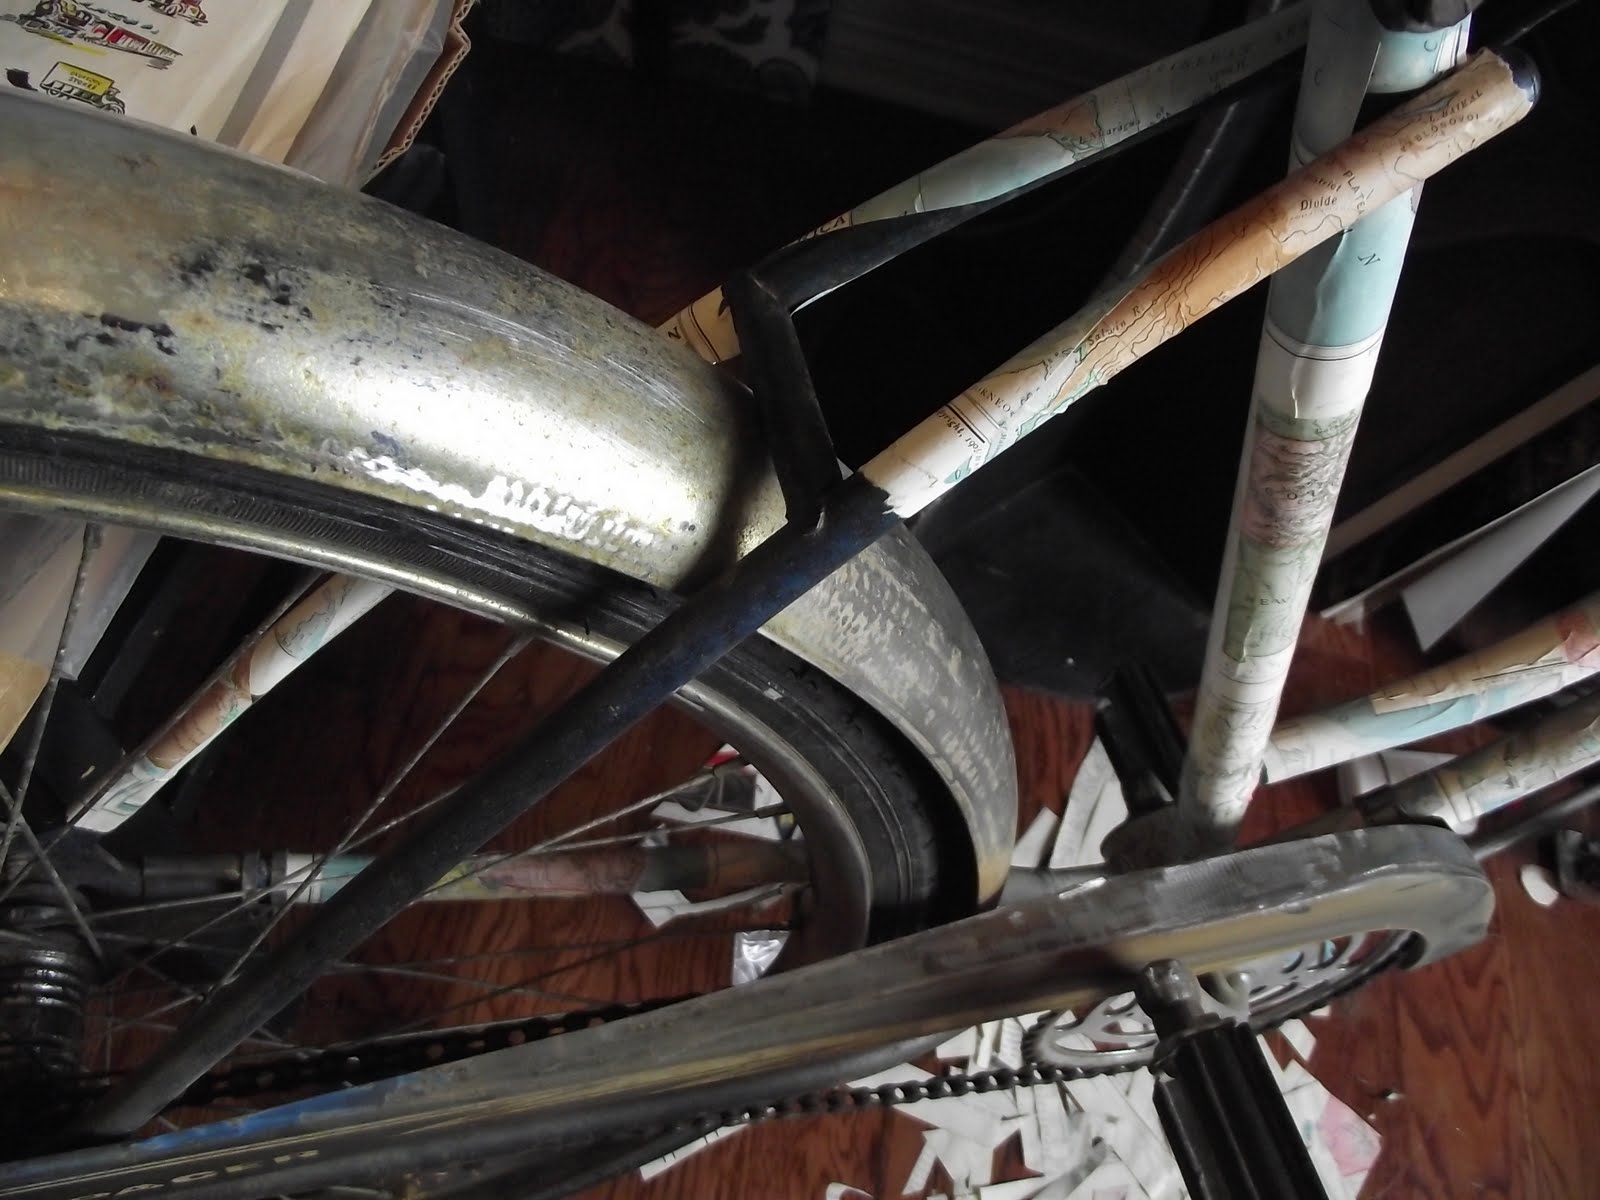 This bike, however, had been unevenly oversprayed somehow with what looked like polyurethane and would have had to be stripped completely to restore it. It would have been equal work to take it back as it would to take it foreward, so I dug in.
This would probably be a good outdoor project, since the glue and paper fall all over the place, but it was pouring rain when I worked on this and also, it looked pretty in my studio. So that's where I did it.
I used a brush to paint on Modge Podge, smoothed out the paper as I went, adding small strips to cover all the metal. When the glue dried, I covered it with three coats of Modge Podge, waiting for about 15 minutes between each coat. I let this harden completely before spraying the whole thing with Krylon triple thick glaze to seal it. (Don't worry, I sprayed it outside. It had stopped raining by then.)
Because the original striped seat was also oversprayed with the nasty yellowed polyurethane or ??? I spray painted the seat as well. I started with a tangerine orange but switched to bubblegum pink, both colors in the antique maps.


The bike should be fully functional and could be hosed off if needed. Should a person decoupage a bike? Why would they want to? That falls in the realm of true artistic opinion. I did it because I wanted to. The bike could be used as is or it could be hung as a sculptural piece. Obviously, using it will result in wear and tear. I'm fine with it either way. I just want it to be loved. ******** Follow up notes: This will fade in sunlight and you must get the spray sealer all the way UNDER the fenders to prevent water from seeping into the paper on the top of the fenders. And lastly, this bike has been sold!
7 comments:
I love this, and I'm seriously considering doing it on my bike. Where'd you get those great old ads? Particularly the "Ride a bike, it's fun!" one.
Hey Mel,
I used clippings from old magazines, mostly Holiday, c. 1950s and 60s. They are loaded with bike ads!
Does anyone know:
1) is the decoupage technique opaque? i.e. will the color of a dark bike show through?
2) if I want to later repaint the bike will this decoupage stuff come off via typical sanding and/or sandblasting?
3) does it not wear off quickly?
Thank you!
Hi there,
The level of opaqueness (that's a word?) is dependent on the paper you use. A napkin will probably show through. These were magazine and book pages, so nothing showed through.
2. I'm not sure about wanting to paint the bike later, but I imagine sandblasting would certainly take it off.
3. It won't wear off if all the edges of the paper are sealed under the decoupage medium and the spray sealer, which is like a layer of paint. It WILL fade in sunlight, though.
I'm doing it...thanks for the idea...
Was it really difficult to do around the joinings? Any tips?
Looks fantastic!
Thinking about doing this for a hand me down bike for my daughter. I was wondering if you thought it would work if I printed images off the computer? If so would cardstock work or just plain printer paper? Love this idea!
Post a Comment